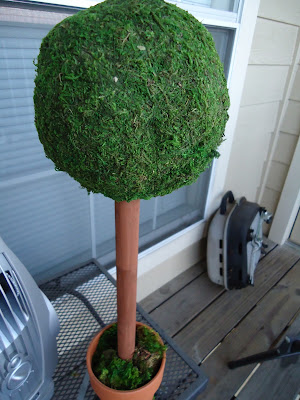
Anywho. Remember my obsession with topiaries? Since we're getting married in a garden, these beauties fit in perfectly with our decor. We're using these placecard holders:
When our guests first walk into our reception, they will be greeted with a table filled with these placecard holders. We also wanted the table to have some sort of banner on it with larger topiaries, like this:
We decided to go the DIY route for the larger topiaries. Which mean...time for another tutorial! Yay!
Materials
- Moss-covered balls (you could get Styrofoam balls and cover them with moss, but I found moss-covered balls at Michael's)
- Two thick wooden dowels (or one long dowel and a saw)
- Brown paint
- Two terra cotta pots
- Dried moss (to fill the pots)
- Ribbon/rope/baker's twine
- Card stock
Most dowels come in that awful saw-dust color, so the first step in this process is to paint them a more natural bark shade.
Next, fill the pots with moss and place the dowels in the pots.
As you can see from the picture, it might be a good idea to do this project outside! The moss shed, and I got lots of dirt everywhere. That would not have been fun to clean out of carpet!
Next, poke a hole in each ball with scissors. This will make room for the dowel.
Stick the moss-covered ball on the dowel and twist to secure.
For the banner, I printed out our names, with the letters spread out. I used my 2″ tag punch to punch out the letters. Then, I taped each tag to some baker's twine and tied each end to a "trunk."
Oh hi, Lion Corgi!
{all personal photos}
The entire project took about 7 minutes...woot! How has your wedding's setting inspired your DIY projects?


No comments:
Post a Comment